For my friends who are not into machining, there are 3 brass pieces in the steady to support longer work piece for machining on a lathe.
I started with a long piece of 1/4" square brass stock. The 1st piece went well without any major mishap. The slot was milled with the stock clamped horizontally. This works ok as I'm able to get in with a single pass but very very slow feed. The pin went in well too with the help of the Proxxon drill press as my arbor press. Hope I didn't spoil the bearings in spindle or any other things.
The 2nd piece was screwed. Everything went well till I was pressing in the pin. The hole on the brass square is a little oversized (maybe by about 0.1mm to 0.2mm). I couldn't seem to press the pin in all the way. Ended up with the pin bended.
Got to stop work then to bring the family out for dinner. No chance to continue after that.

Turning down aluminium rod to 3mm

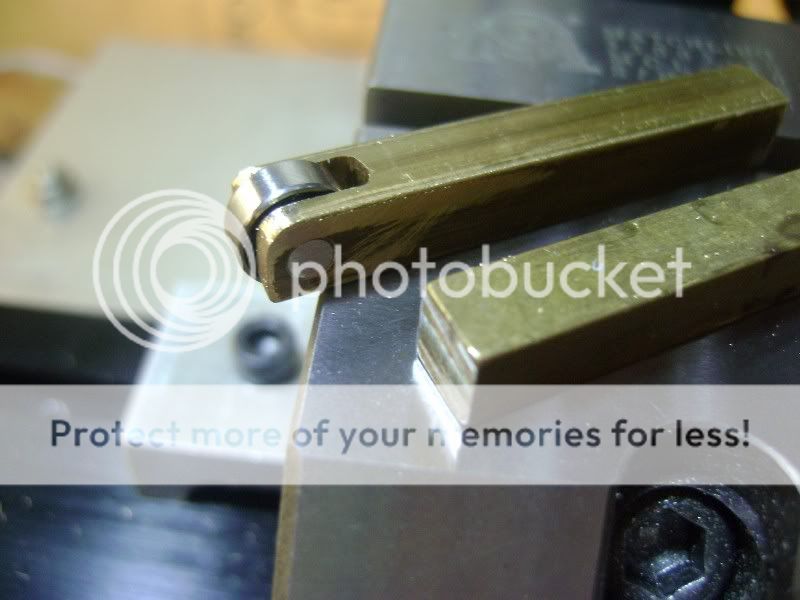
Milling the slot for the ball bearing after the axle hole is drilled.

Ready for assembly

Pressing in the pin using my Proxxon drill press. Bearing able to rotate freely
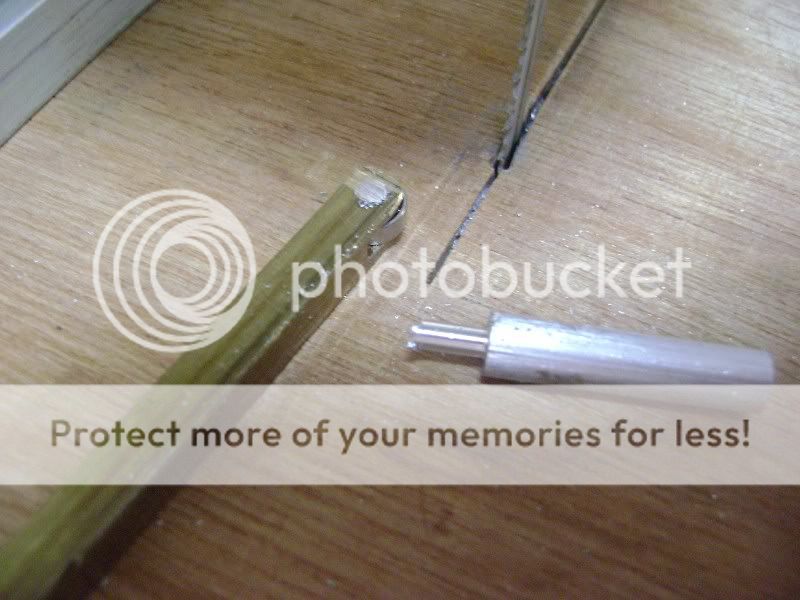
Sawing off the excess
1st piece done. Not very good looking but it works.

For the 2nd piece, I decided to try rounding off the edge. This is from a video I watched online. You can see from the side facing the camera that I turned the workpiece too much...

This time I milled the slot with the workpiece vertical. A square was used to ensure the part being perpendicular to the table. This is to have the square bottom.

This one looks a little nicer than the 1st piece.

Press fit went wrong. I don't know what's wrong. Couldn't seem to get the pin in this time. The pin hole on the brass square is a little too big. The pin was turned to 2.99mm in diameter.
I'll continue in my next session. This was supposed to be a 1 to 2 hrs job (given my current level of skill, or the lack of).
Let's see if I can complete the 3 arms.
1 comment:
It looks like you're off to a good start on these, Wong! If the pin is a bit undersize for a press fit you could use a knurling tool to slightly enlarge the diameter of the pin. Did you use a reamer on the bores of the brass arms? A slight taper on the end of the 3mm aluminum pin that's going through the bearings and a bit of oil may help. I would probably also verify the consistency of the bores in the bearings.
The method you used to radius the end of the second piece in the vise on your mill looks much more convenient than filing them down! You may be able to clamp or fabricate a couple of quick stops to keep a consistent radius on the end of the brass arms and the end mill out of the sides of them if you wanted.
Thanks for the comments, Wong-keep up the good work!
Adam Collins
Post a Comment